How to make a mitered lapjoint / scarf joint for construction with timber.
Mitered joints and miter half lap joints for woodworking.
The mitered lap joint is a visually attractive method to join two or more pieces of timber.
This wood joinery method is great for homemade furniture.
On the other hand, the scarf joint is not the strongest method to connect wood.
If you do not have the special powertools then you will have to make this joinery in the classic way.
A sharp woodsaw and perfect chisels are essential to make a good mitered wood joint.
The half lap mitered lapjoint version is even more prone to defects and errors during the assembly.

A mitered lap joint is commonly used to make wooden beams longer.
Lap joints are also very common in the construction of frames for furniture.
This joinery method provides excellent strength combined with a good looking joint.
There is more contact space between the parts as a result of the angled cutting line.
Mitered joints are the most common method for wood joinery.
The lap joints with miter are stronger and are less likely to move if the wood dries out.
You can use dowels to improve the hold.
Screws are more commonly used to make these joints stronger when used for elongating beams.
That is because screws have a better tensile strenth than dowels.
How to make a mitered lap joint for wooden beams.

- As always you will have to start by making the wood edges completely straight.
It is very rare that timber arrives with perfect straight cutting edges. - Measure all sides of your timber.
Write all sizes down on paper.
The height of this wooden beam is marked with a B.
We presume in this example that the width is 8 centimeters and the thinner side 4 centimeters.
So, for this woodworking example we start wiith timber size 8×4. - Draw the cutting lines on your wood.
Each part has to be cut in at two and a half times the height from your timber.
If the timber is 8cms. high, then we multiply that by 2.5, resulting in 20 centimeters.
The depth of this cut is about one seventh of the timber height.
For this mitered woodjoint we cut to a depth of 1.2 cms.
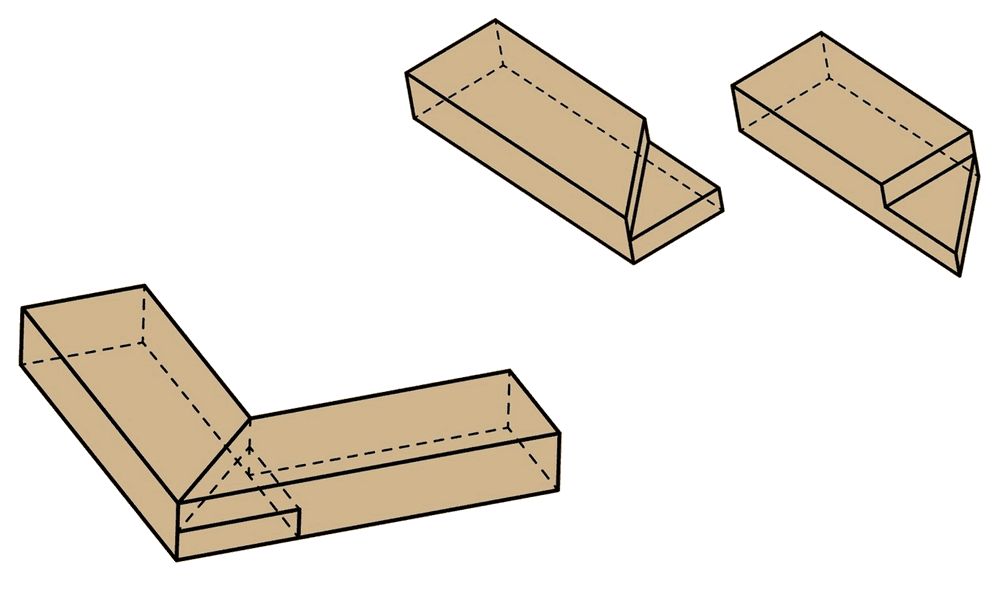
Do the same at the end of your timber, such that the miter falls into the timber. - Draw a line from the cutting line at the timber end towards the other cut.
Make a very clean cut across this line. - Now repeat the same process on your other piece of lumber.
Both parts must look the same and fit perfectly together.
Use a chisel and sander to make all sides smooth and flush. - Apply wood glue to all the wood that will be in contact with its counter part.
- Fit both parts flush against each other.
Drill two or more holes for screws.
You could use self tapping screws, but it is nevertheless wise to pre-drill before driving the screws into the wood. - It is wise to fit one or two screws from the other part as well.
That way you will give a lot more tensile strength to this mitered lap joint.
These woodworking examples for joinery were first published on the Dutch woodworking pages of steigerhout bouwtekeningen.
The mitered half lap joint is similar to the previous wood joinery method.
A professional method of joinery when you make a frame for furniture.
The half lap mitered woodjoint is also very strong to make frames for construction of buildings.
More methods for wood joinery.


