Lounge chair construction manual and building instructions.
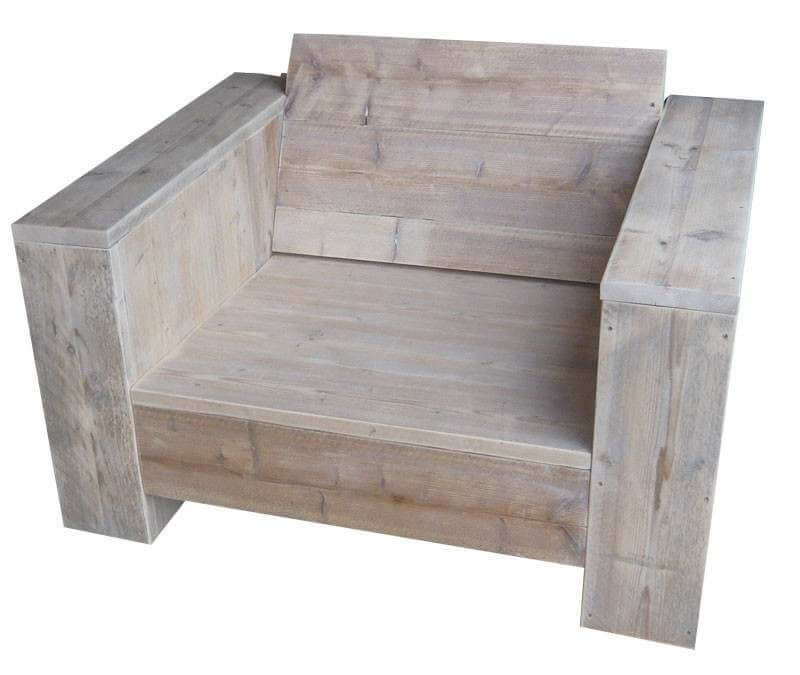
Constructing this homemade lounge chair is really simple.
The method of assembly for a chair is identical to the construction of garden benches.
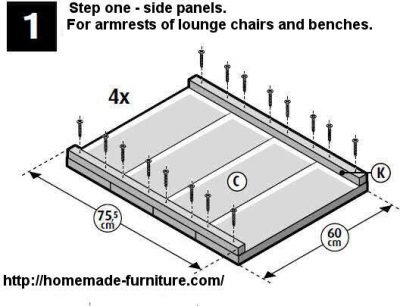
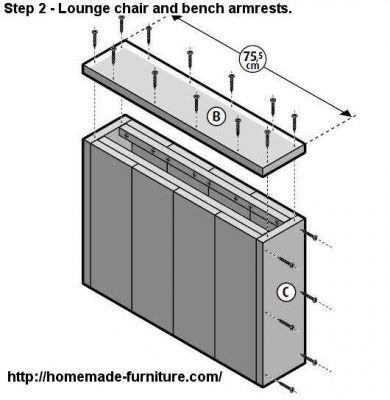
You can see step one and two on these construction drawings, how to make the sides for wooden chairs and benches,
B – 30 x 195 mm x 842 mm.
C – 30 x 62 mm x 810 mm.
- Shorten your planks C to a length of 60cms, this is the height of your armrests and the side of the chair.
How many planks C you need to connect depends on the width of each plank.
You may have to connect three, four or five planks together with two connecting slats.
The total length of each part should be close to what is shown on the construction drawing.
A good size for the depth of these scaffolding wood garden chair is close to the 75,5cms, on this drawing for the chair. - Make two armrests, each consisting of two previously made panels.
Screw two planks against the sides and one on top. - Attach a seat support plank on the inside on one side at each armrest.
This plank does not go further then the end of the seat.
Note that the backrest of your homemade chair gets partly attached to these planks as well.
As a rule of thumb you can have the top of this support plank at a height of 38 cms.
Determining the alternative height at which you want to have the seat.
Bear in mind that the seat has a same thickness as the planks, so you will have to discount the thickness.
You might also want to see the original construction drawings for this wooden chair.
These former mentioned instructions are in Dutch, with automatic translation option.


